

")

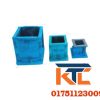
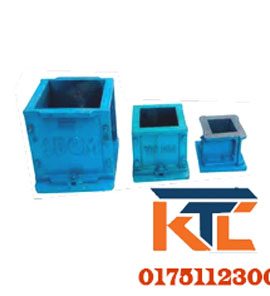
concrete cylinder mold:
The concrete cylinder mold is a critical tool in civil engineering and construction quality control.Here is a breakdown of what it is and the standard procedure for how to use it.
🏗️ What is a Concrete Cylinder Mold?
A concrete cylinder mold is a device used to create a standardized, cylindrical specimen of fresh concrete taken from a batch on a construction site.2
The primary purpose of the resulting hardened concrete cylinder is to be tested in a laboratory to determine the compressive strength of the concrete mix.3 This test is essential to ensure the concrete placed in the structure (like a beam, column, or slab) meets the strength requirements specified by the engineers.
Key Characteristics:
-
Shape and Size: The molds are designed as right circular cylinders.5 The most common standard sizes follow a 2:1 length-to-diameter ratio, such as:
-
6 inches 6$\times$ 12 inches (150 mm 7$\times$ 300 mm)8
-
4 inches 9$\times$ 8 inches (100 mm 10$\times$ 200 mm)
-
-
Materials: Molds are typically made from:
-
Single-use plastic (most common in the field for ease of use)12
-
Reusable steel or cast iron (often used in labs or for high-strength concrete)13
-
-
Standards: Their dimensions and usage procedure are strictly governed by international standards like ASTM C31 and ASTM C39 (in the US) or EN 12390-1 (in Europe) to ensure test results are consistent and comparable.14
🛠️ How to Use a Concrete Cylinder Mold (The Molding Process)
The concrete cylinder mold process of making concrete cylinders is done in the field at the construction site right after the concrete is mixed and before it is placed. The procedure ensures the concrete in the mold is representative of the concrete being used in the structure.15
The following steps are based on common industry standards for a 6″ $\times$ 12″ mold:
1. Preparation (Before Filling)
-
Clean: Ensure the mold is completely clean and free of any residual concrete or debris.16
-
Release Agent: For reusable molds (steel/cast iron), apply a thin layer of form release agent (e.g., oil) to the inside walls to prevent the concrete from sticking and allow for easy removal later.17 Single-use plastic molds usually do not require a release agent.
-
Placement: Place the mold on a level, rigid, non-absorbent surface that is free from vibration.18
2. Filling and Compacting (The 3-Layer Method)
The is placed in the mold in three layers of approximately equal volume.19 After each layer is placed, it must be compacted to remove entrapped air (air voids).20
| Layer | Volume to Fill | Compaction Method (Tamping Rod) |
| First Layer | Approx. $1/3$ of the mold height. | Rod 25 times. The rod must penetrate nearly the full depth of the layer without hitting the bottom of the mold. |
| Second Layer | Approx. $2/3$ of the mold height. | Rod 25 times. The rod should penetrate the first layer by about 1 inch to ensure continuity between layers. |
| Third Layer | Overfill the mold slightly. | Rod 25 times. The rod should penetrate the second layer by about 1 inch. |
After Rodding Each Layer:
-
Lightly tap the sides of the mold 10 to 15 times with a rubber mallet or an open hand.21 This helps to close the voids left by the tamping rod and release large air bubbles.
(Note: If using a vibrator, the concrete is typically placed in two equal layers, and the vibrator is inserted for a few seconds until the surface is smooth and free of air bubbles.)22
3. Finishing and Curing (Post-Filling)
-
Strike-Off: After compacting the final layer, use a tamping rod or a hand float to strike off the excess concrete, creating a smooth and level surface flush with the top of the mold.23
-
Cover: Immediately place a tight-fitting plastic lid on the mold to prevent any moisture loss (which is critical for proper hydration and strength gain).24
-
Initial Curing: Move the cylinders to a protected location for the first 24 hours.25 The initial curing environment must maintain the specified temperature (typically between 26$60^\circ \text{F}$ and 27$80^\circ \text{F}$ or 28$16^\circ \text{C}$ and 29$27^\circ \text{C}$) and prevent moisture loss.30
4. Demolding and Final Curing
-
Demolding (24-48 hours): Carefully remove the cylinder from the mold.31 Single-use plastic molds are often cut or stripped off.
-
Final Curing: The bare concrete cylinder is then transferred to a laboratory curing room or a water bath maintained at a standard temperature (e.g., 32$73.5^\circ \text{F} \pm 3.5^\circ \text{F}$ or 33$23^\circ \text{C} \pm 2^\circ \text{C}$) until the designated testing age (7 days, 14 days, or 28 days).34
The concrete cylinder mold final product is the concrete cylinder, which is crushed at the specified age in a compression testing machine to determine its ultimate compressive strength.35
Would you like me to elaborate on the difference between standard curing and field curing?
(4’’x8’’) (100×200)mm= (1set)=3 pcs
Be the first to review “concrete cylinder mold”
You must be logged in to post a review.
Related products


Reviews
There are no reviews yet.